I’ve been working on this post for quite some time now. I’ll probably be adding to it in the future when other item quandaries come about. It’s a helpful aggregation of insider tips and hints about how to clean and care for the items you pick up on your thrifting adventures – Cheers!
You Just Bought: Used CD, DVD, Glass Frame, etc.
Problem: Residual sticker goo from price tags. It’s unsightly, annoying, and the OCD in me needs to get it off of there.
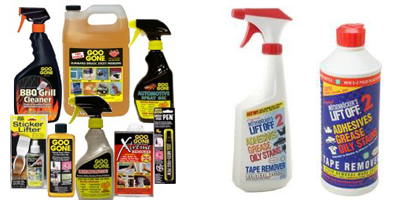
Solution: Goo Gone or (my personal favorite) Lift Off Tape Remover. Both items are pretty nasty chemical-wise, but these two definitely work the best and the fastest. A little bottle goes a long way. Spray a bit onto the gooey area and let it sit for a couple of minutes then with some gentle rubbing it should swipe perfectly clean.
You Just Bought: DUSTY Antiques (Hard wood Furniture, Silverware, Collectibles).
Problem: You want the dust & dirt off. You want the original glory of the item to show through.
Solution: To restore & clean an antique is to get it back as close to original as feasible. Back in the day, there was no such thing as polyurethane, so antique restoration can’t include coating an antique with plastic and have it be the same as original.
RULE OF THUMB: If you don’t need to clean it, then don’t. Most old collectibles are sought FOR the tarnished and beat up look. These items ooze with character and tell a visual story. I personally just use a barely moist cotton cloth to gently clean and dry the items I find, 99% of the time.
– When cleaning old wood furniture, use mild cleaners such as Murphy’s Oil Soap or Prelude.
– When cleaning old toys or antique signage use a clean rag, warm water with a tiny bit of natural or plant-based soap and be sure to dry it thoroughly to prevent further oxidation or corrosion.
– When cleaning antique silverware it’s a step by step process best shown here.
TIP: If there is soil or stains that can not be cleaned by a gentle washing, consult an antique expert before using any type of metal cleaner on your antique. Further cleaning may be possible once the type of metal and value of the item has been determined.
You Just Bought: Old clothing / vintage garments.
Problem: Someone wore them or used them before you. They’re lovely and delicate. But you want them clean.
Solution: If the item is cotton-based such as an old t-shirt or jeans, I just toss them in with a like color and use a gentle natural detergent and put it on the gentle cycle. For a more in-depth look at how to clean some trickier fabrics such as vintage lace, linens, and fabrics, this article here is great.
You Just Bought: Wool Scarf, Blanket or Jacket.
Problem: It’s old but cool, kind of itchy, smells vaguely like an animal shelter.
Solution: If it’s a jacket or cardigan, I usually take it to my local (eco-friendly) dry cleaners. They can get almost anything looking (and smelling) brand new for relatively cheap, less than $10 a garment. “If you can’t beat ’em, re-post ’em.” So here’s a more thorough article on how to care and store various wool garments.
You Just Bought: USED Vinyl Records
Problem: Vinyl is near and dear to audiophiles and collectors like myself. Whenever I move, my collection has been personally moved by myself and rode in the car with me, as if they were my own children. Some vinyl records can be 50 (or more) years old by now. That means decades of dust, dirt, weather and stacked pile compression have most likely pressed grit into your beloved grooves.
Solution: After I thrift or buy any used vinyl, I take them home and GENTLY give them a once-over with a barely wet cloth, warm water and dry them. One commonly used item that I own is a record brush. Just static alone can attract a lot of dust and icky stuff to your records. I give each record a pass with it before it hits the player and after when it’s about to return to it’s casing. Another way to protect your records are to store them all in the clear vinyl sleeves and to replace the inner paper sleeves. These help keep them fresh, protected and looks pretty nice too. I purchase all my vinyl supplies bulk online here.
You Just Bought: A USED Turntable
Problem: It’s dusty, it’s mod, all the knobs and components are intact – but does it still work?
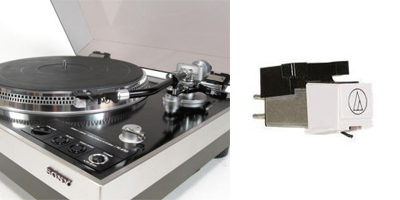
Solution: Having recently taken a gamble on a really neat turntable, which I chronicled in a recent post here, I learned that as long as you can get the turntable for a good price, that the most important components on a turntable are replaceable and are fairly cheap to have installed. The two main things you want to have replaced on any turntable is the needle/cartridge (every 2-5 years minimum) depending on the frequency of use. Cartridges can range anywhere from $15 up to thousands. The other component to replace and have professionally calibrated is the belt. This is the heart and drivetrain of any turntable. These wear out and dry out just like the belts on your car or a common rubber band might. Turntable belts range from anywhere from $15 up to hundreds.
You Just Bought: A Used Couch, Sofa, Chair, etc.
Problem: It’s perfect, it’s beautiful, but it’s been someone else’s.
Solution: Personally, I usually just vacuum and Febreze the hell out of used soft furniture items when I acquire them. But I’ve recently found a greener option. A DIY way to make a safer (and cheaper) version of Febreze here.
LIKE THIS BLOG? Become a fan and add us on our Facebook fan page. Get updates and follow on Twitter! (@thingsifound). Oh, and here’s my personal Twitter handle as well: @JPeddycoart

